










Register every appointment with the correct customer, service, professional and operational outcome.
Before you start
- Create the service and assign at least one professional.
- Check the customer by email or phone to avoid duplicates.
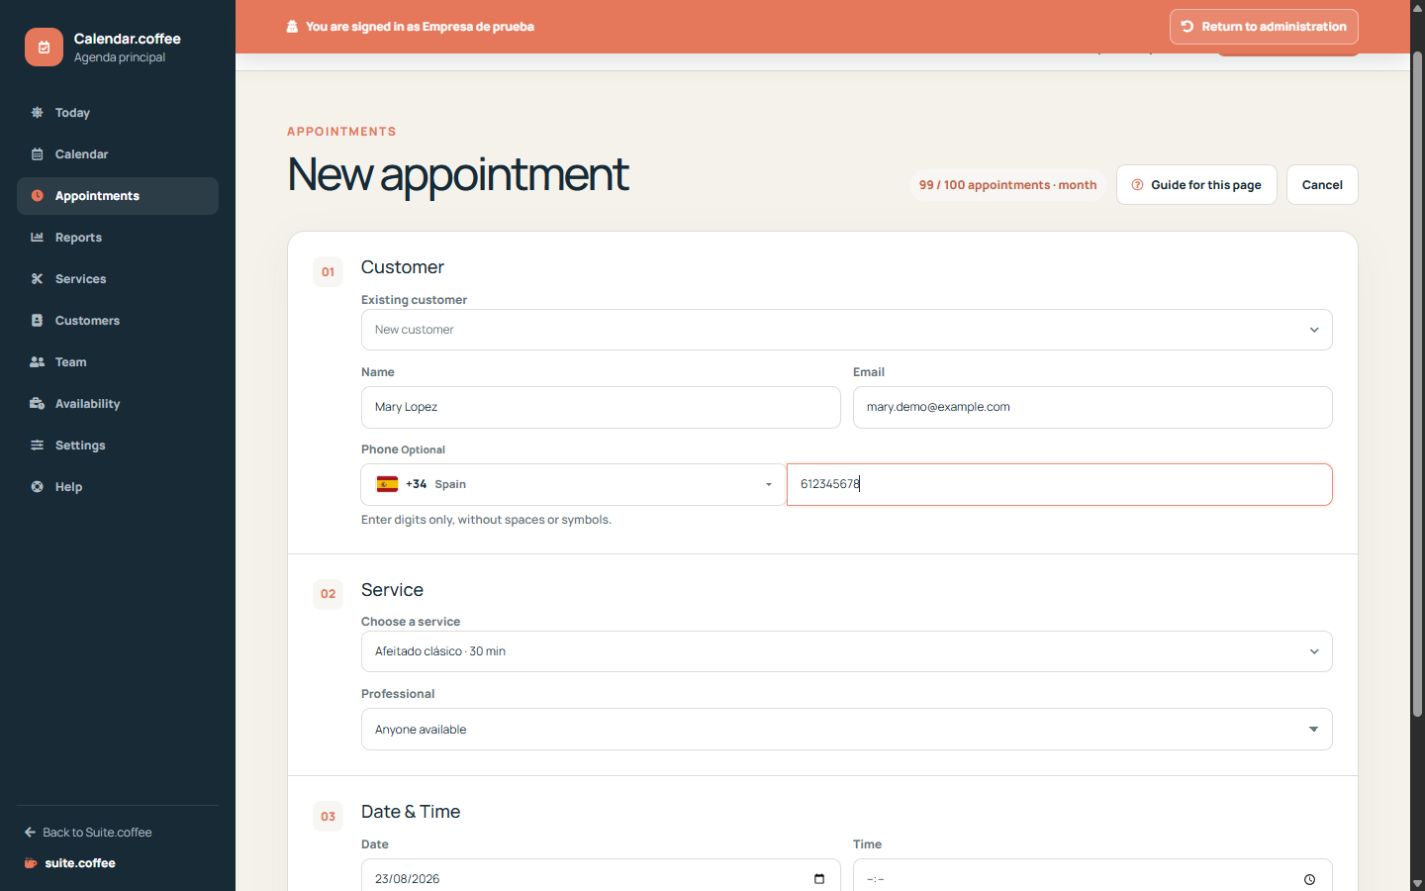
Create the appointment
Select an existing customer or enter a new one, then choose the service, professional, date and available time. Add notes only when they help deliver the service.
Respect availability
Calendar combines service duration, buffers, usual hours, exceptions, blocks and existing appointments. If a time is unavailable, correct the schedule rather than forcing an overlap.
Keep the status current
Use confirmed, completed, cancelled or no-show according to the real outcome. Cancelling releases the occupied time immediately; changing status preserves the appointment history.
Step by step
- Open Appointments and select New appointment.
- Search for an existing customer; create a new record only when no match exists.
- Choose the service and an eligible professional, or allow automatic assignment.
- Enter the date and time and add only useful service notes.
- Confirm the appointment, then open its detail to verify it.
- After service, mark it completed, cancelled or no-show according to the real outcome.
Final check
- Customer contact details identify the right person.
- Duration and buffer leave the expected occupied time.
- Status reflects what actually happened.
Tip: If a time is rejected, review availability, exceptions, blocks and existing appointments instead of forcing an overlap.