










Prepare the booking page once so customers only see valid services, professionals and times.
Before you start
- Create at least one service and one active professional.
- Confirm the business country, timezone, currency and primary language.
Complete the initial set-up
Create the first bookable service and define the usual working hours. Calendar uses the instance country, timezone, currency and primary language for public dates and prices.
Review booking rules
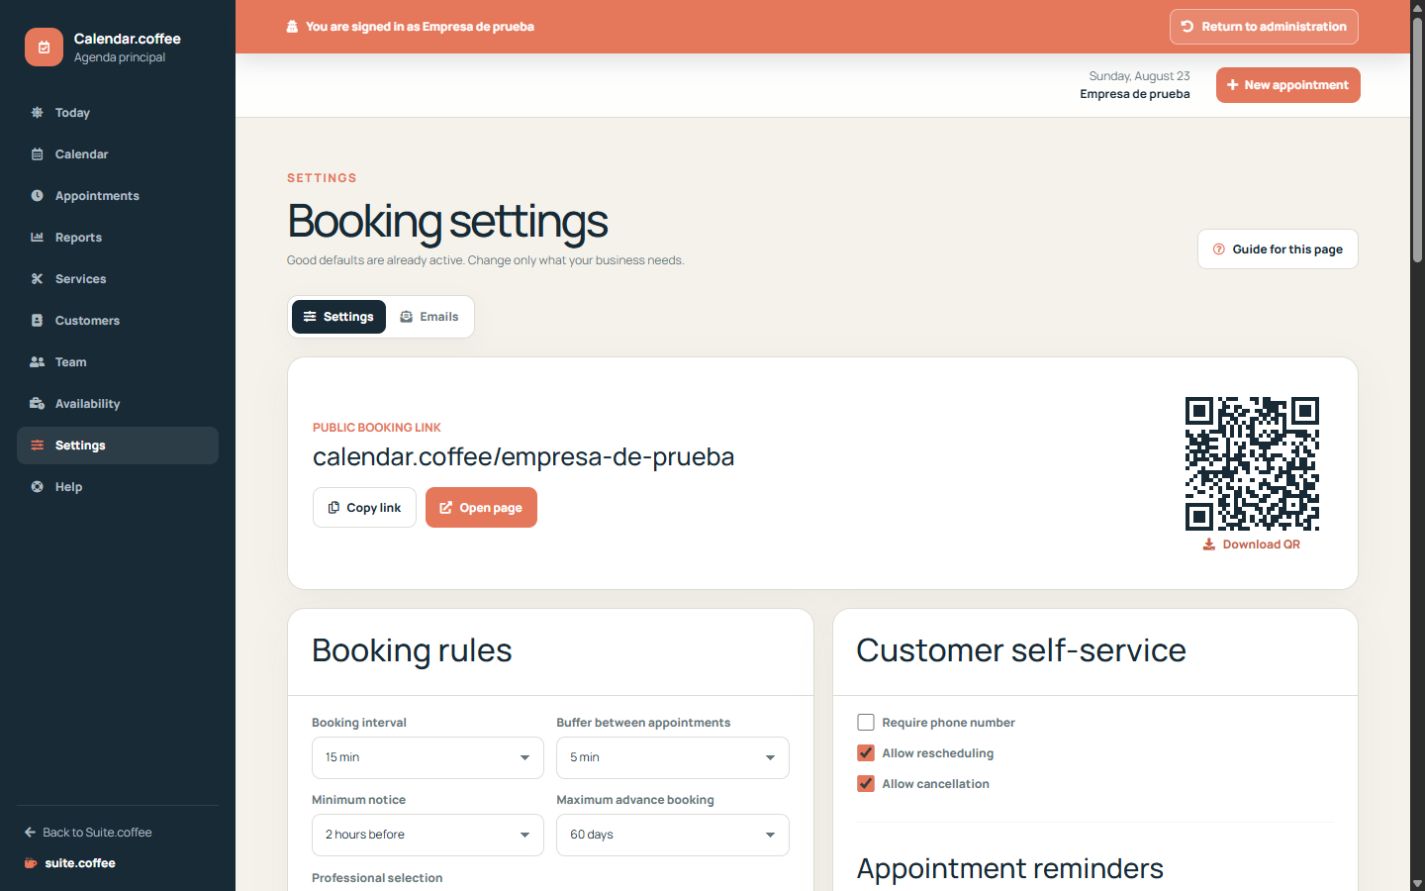
Choose the booking interval, minimum notice, maximum advance period and buffer between appointments. Decide whether customers can choose a professional, reschedule or cancel.
Share the correct page
Use the booking URL or QR shown in settings. The public flow verifies the customer email before confirming an appointment; it does not create a Suite account.
Step by step
- Open Settings from the Calendar sidebar.
- Review the public booking link and open it in a separate tab.
- Set the booking interval, minimum notice, maximum advance period and buffer.
- Choose how professionals are assigned and whether customers may reschedule or cancel.
- Save and complete one test booking with a demonstration email address.
Final check
- Public dates use the expected timezone and language.
- Prices use the configured currency.
- The test booking offers only valid services and available professionals.
Tip: Change regional settings before publishing the link. Existing monetary records are not converted when the currency changes.